This blog is hosted on AWS S3 fronted by CloudFront using a custom domain in Route53. If some or none of those things made any sense to you, no worries, we will walk through all of it together.
What are all those things?
First let's start with S3. S3 stands for Simple Storage Service. It is a service provides by AWS to store files. These files can be private, public, or a mix. For the purposes of this post, we will be going over how to serve public assets over the internet.
CloudFront is AWS' CDN offering. It is a service that caches content so that it serves it up quicker for users around the world.
Route53 is AWS' domain service. This is where you can buy and host your own domain, like this one, brockdavis.codes.
This tutorial assumes you already have an AWS account. If not you can sign up for one at here. It also assumes you have already purchased a domain through Route53.
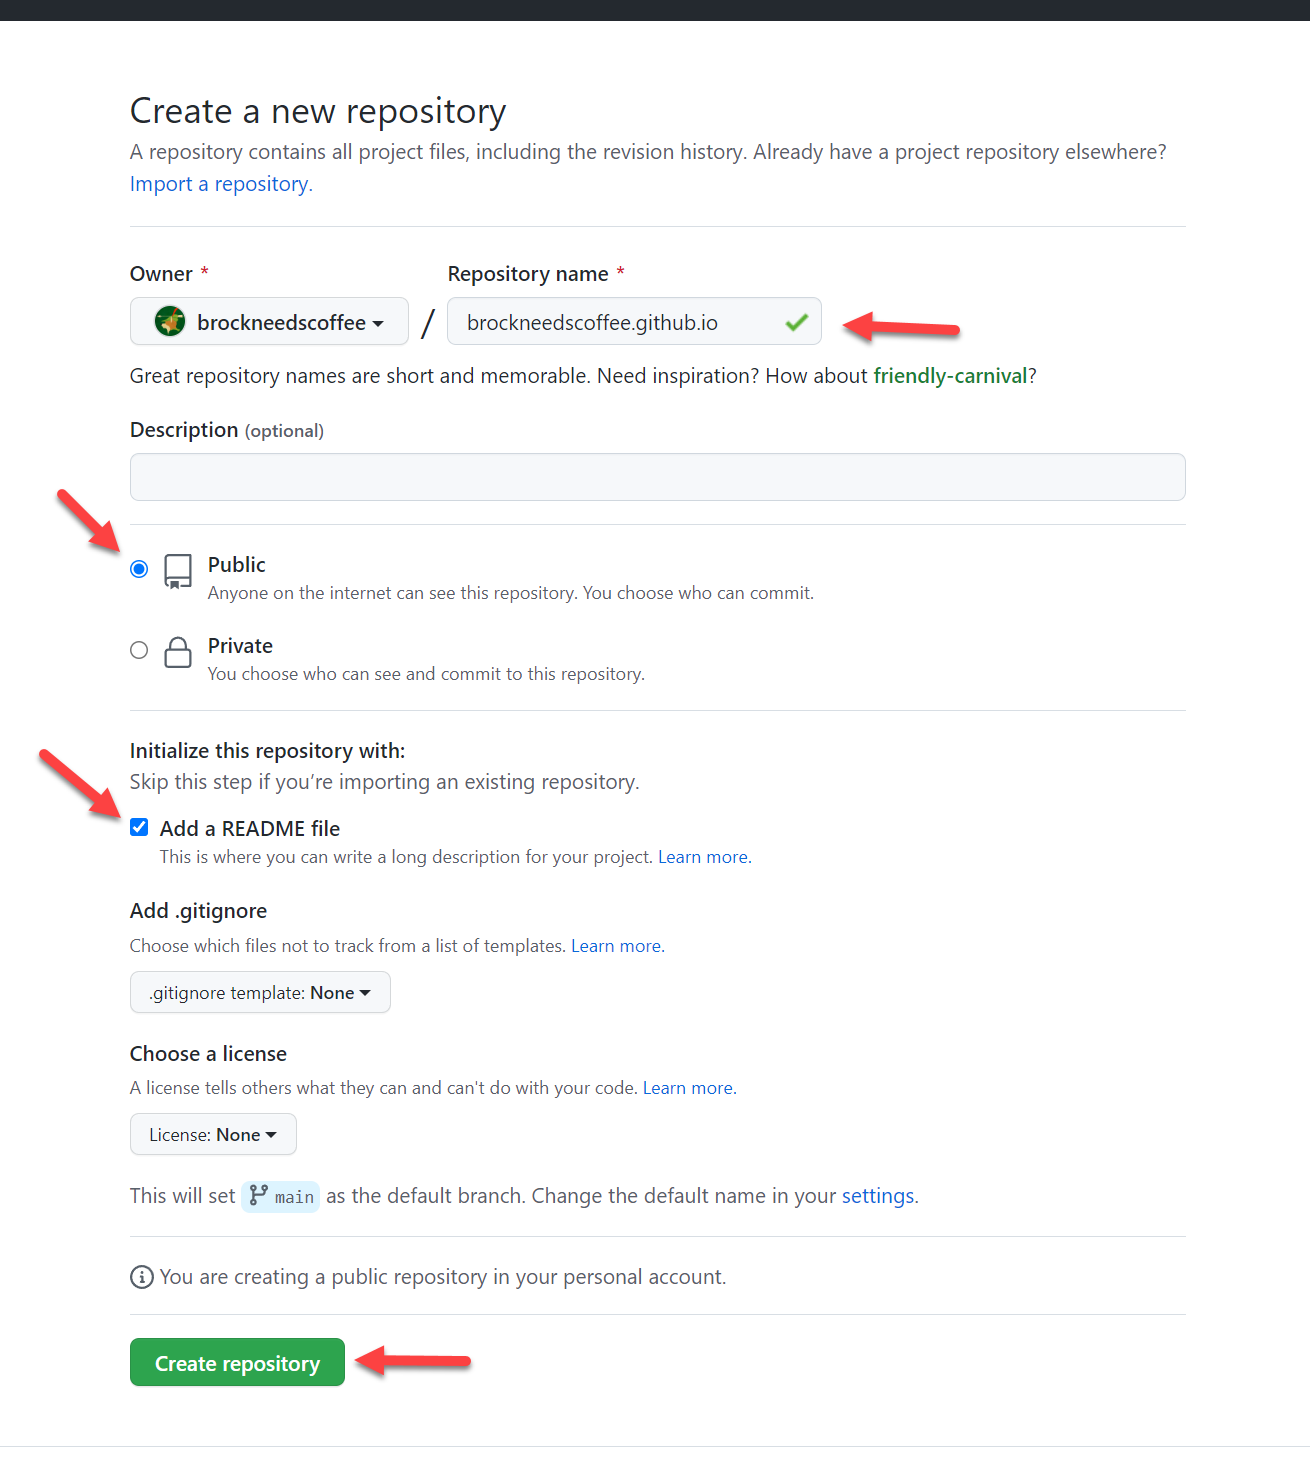
Setting up S3
First search for S3.
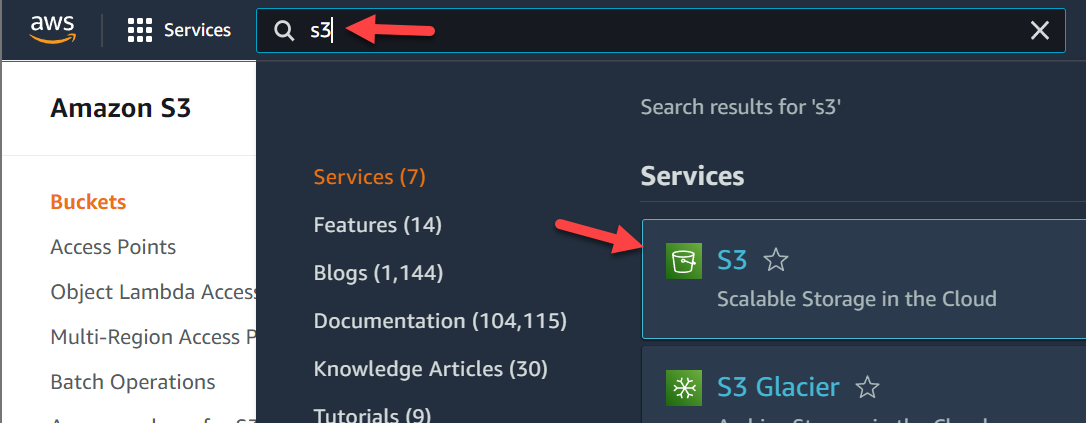
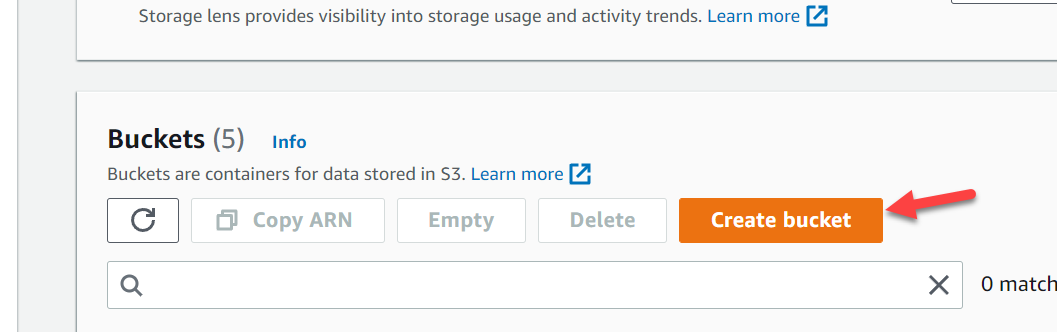
Click Create bucket.
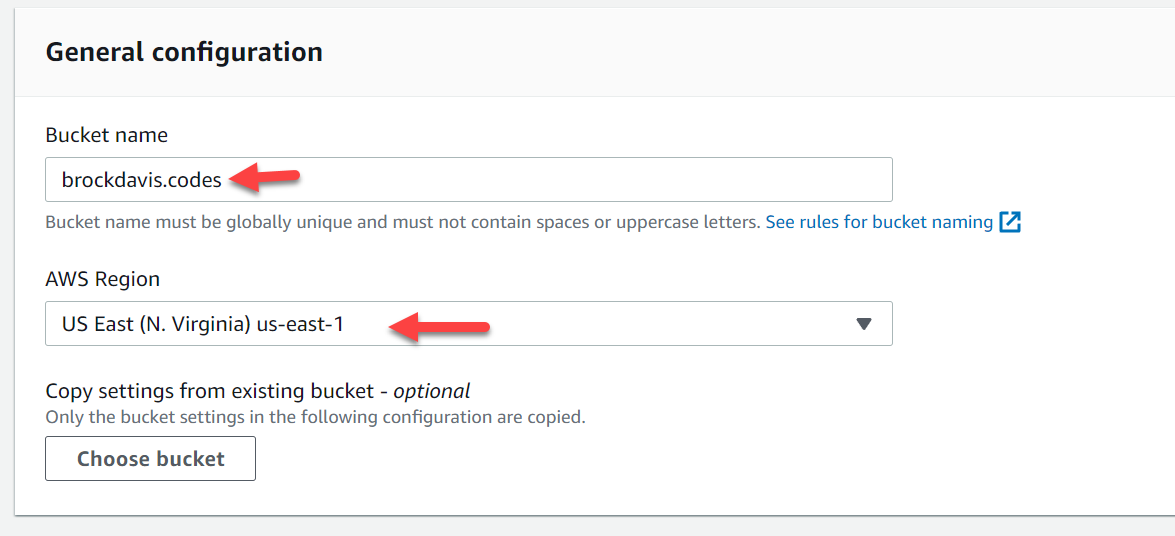
Set the name to your Route53 domain. For example, mine is brockdavis.codes
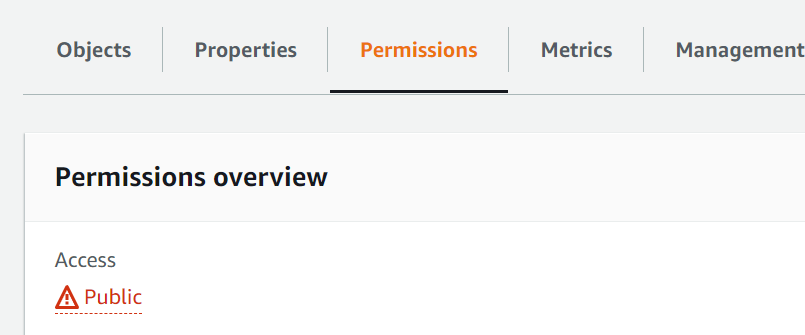
Click the Permissions tab.
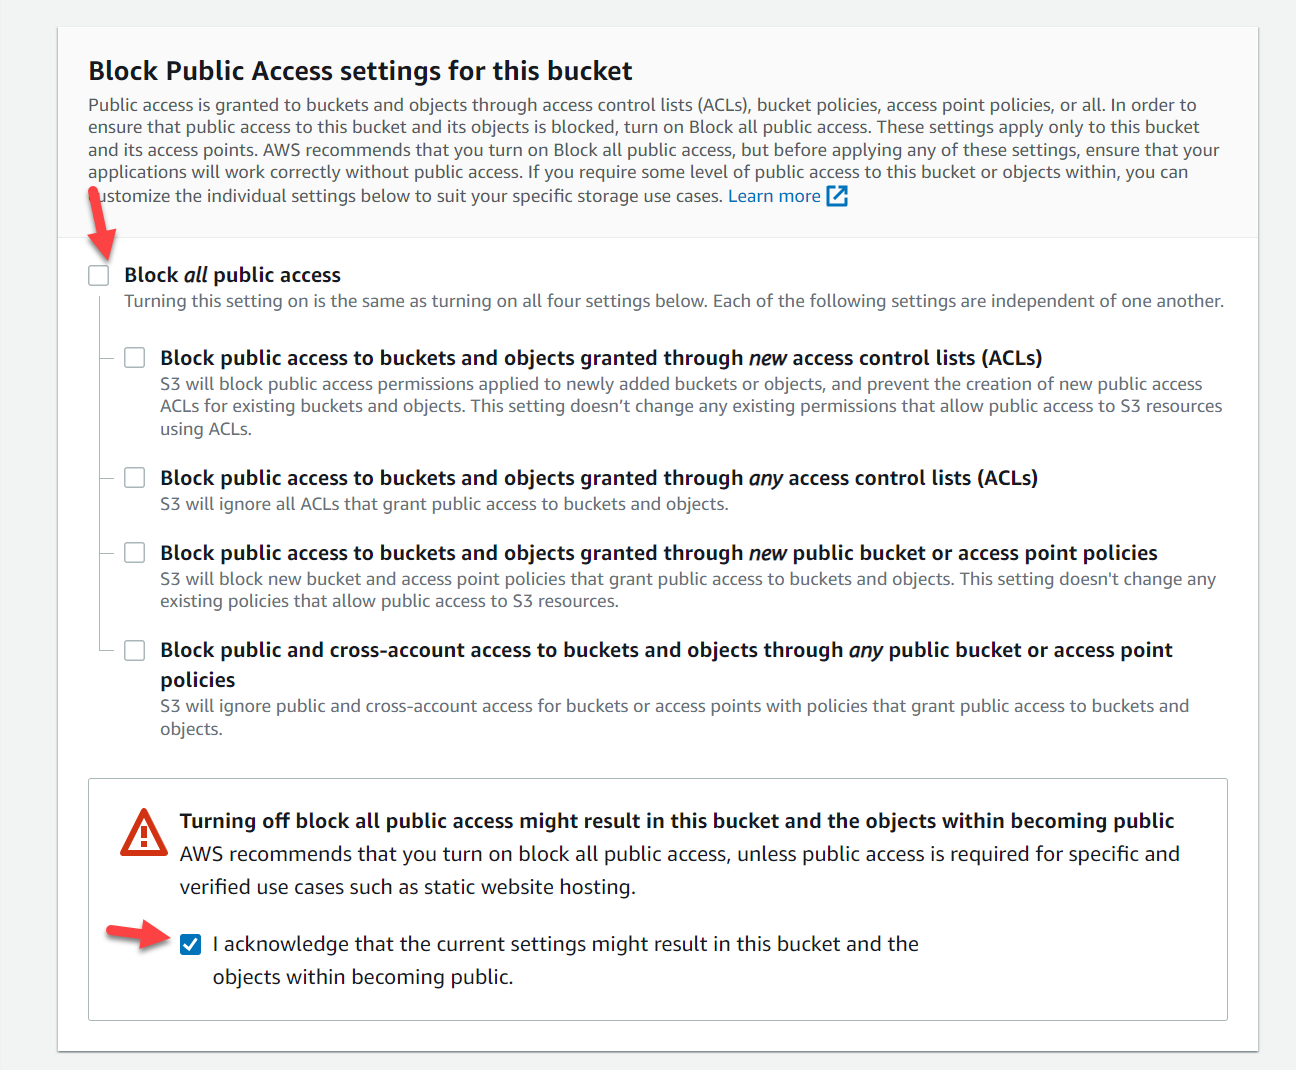
Uncheck the Block all public access box and check the box acknowleding that it may be public.
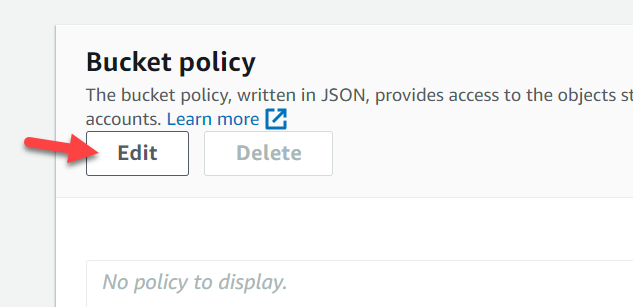
Scroll to Bucket policy and click Edit. and use the policy below. Make sure to replace BUCKET_NAME with the name of your bucket.
{
    "Version": "2012-10-17",
    "Statement": [
        {
            "Sid": "PublicReadGetObject",
            "Effect": "Allow",
            "Principal": "*",
            "Action": "s3:GetObject",
            "Resource": "arn:aws:s3:::BUCKET_NAME/*"
        }
    ]
}
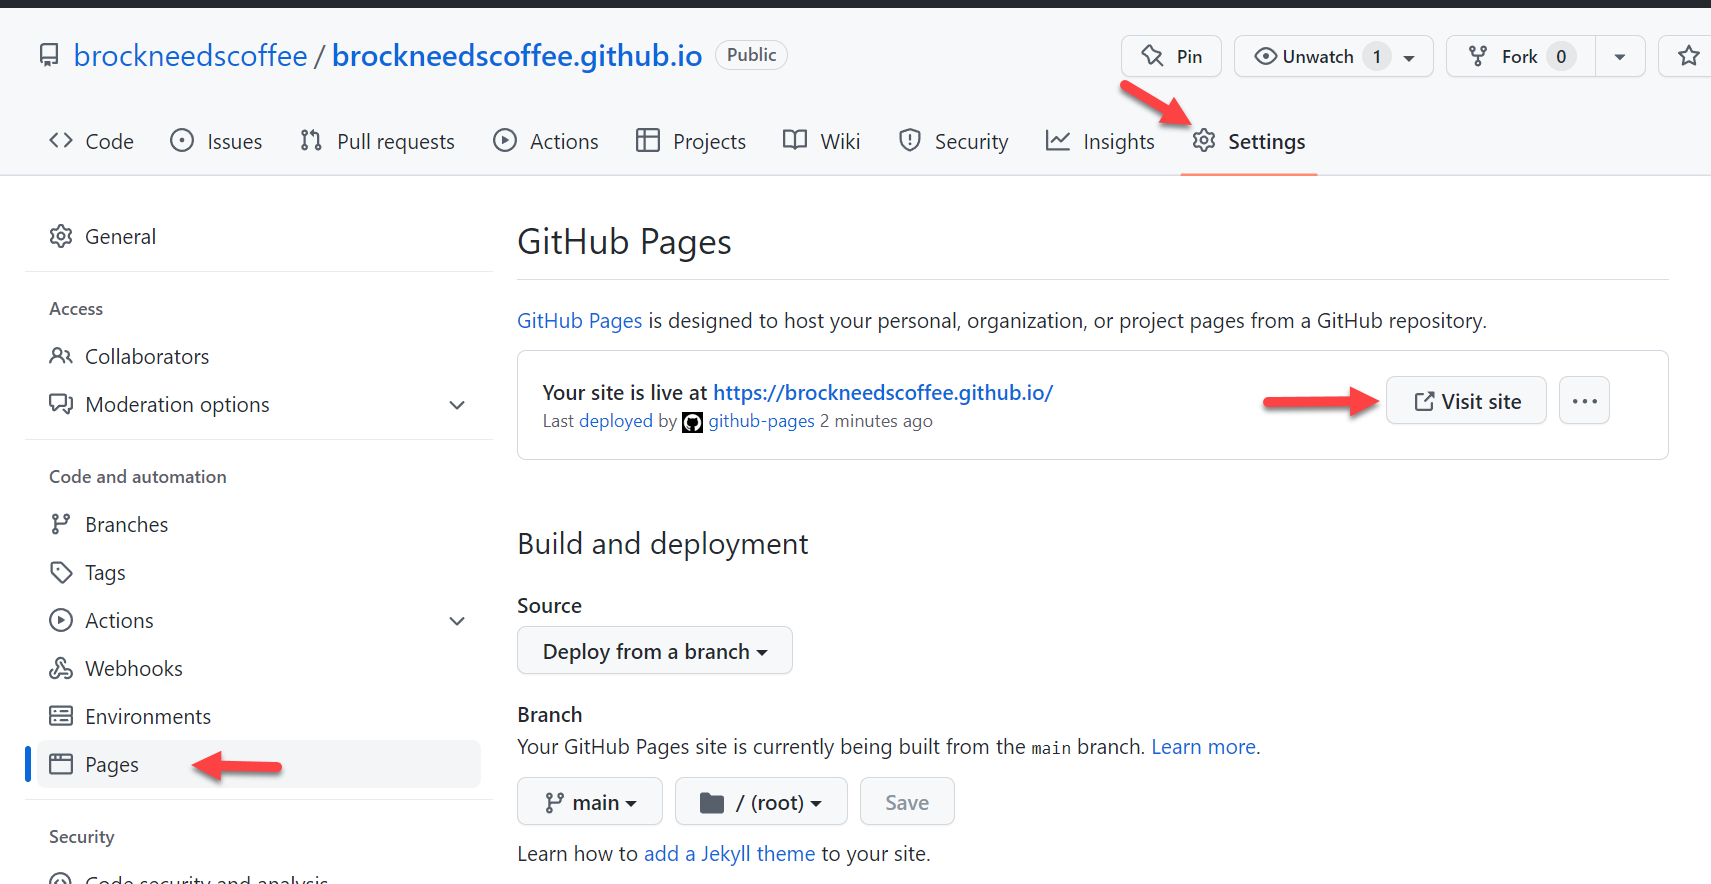
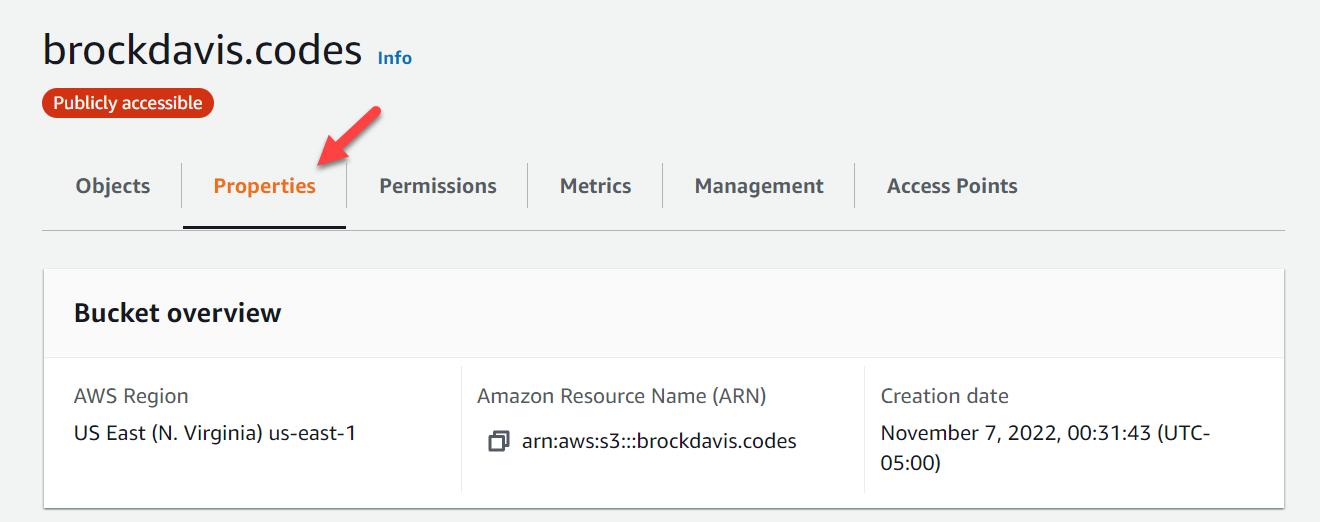
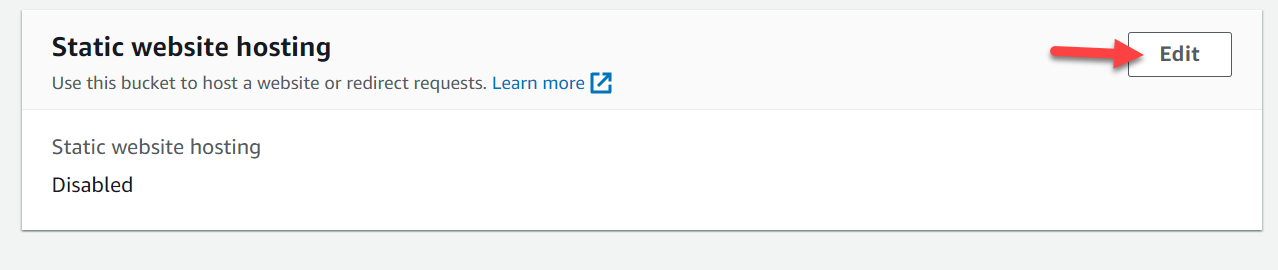
Click the properties tab and scroll to the bottom and click edit under the Static website hosting header.
Click Enable and set your index document. For example, mine is index.html.
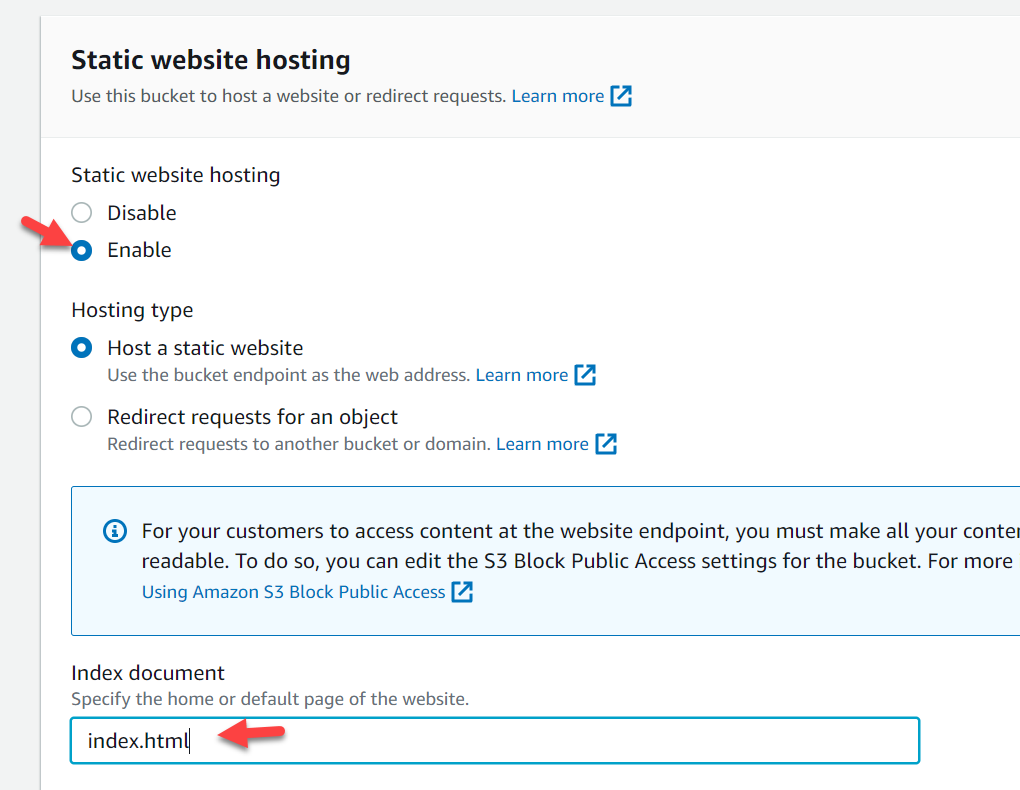
Once this is saved make sure to copy the static hosting URL without the http. You will need it for CloudFront

Setting up CloudFront
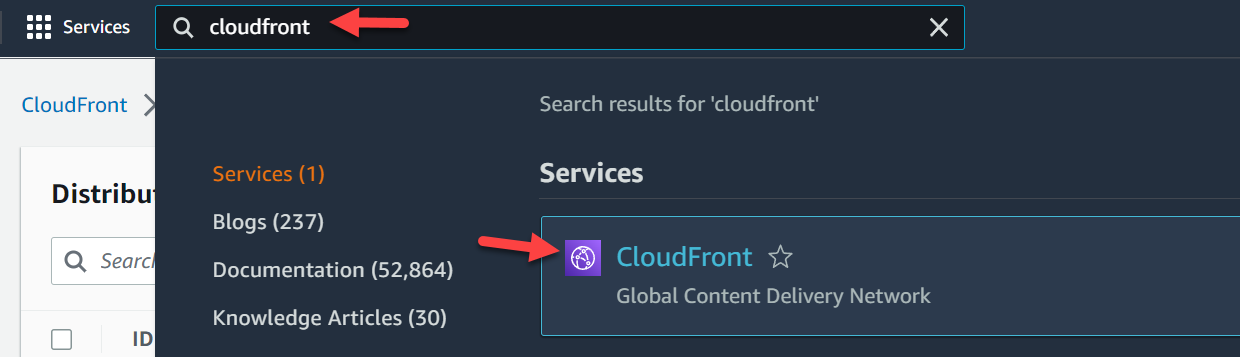
Search for CloudFront.
Click Create distribution

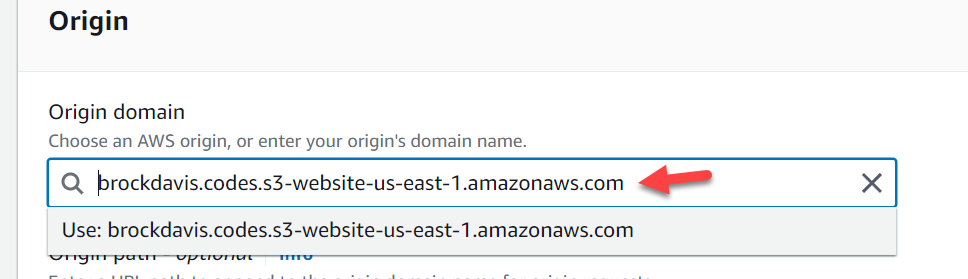
For the origin, use the uri you copied from your S3 bucket. Make sure to not use the http
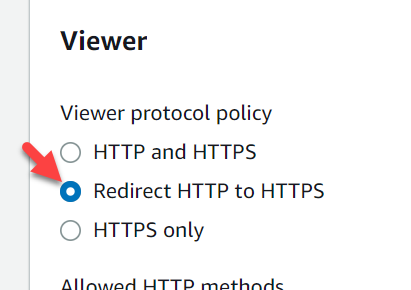
Scroll down and under Viewer select Redirect HTTP to HTTPS.
Add your domain as a CNAME.

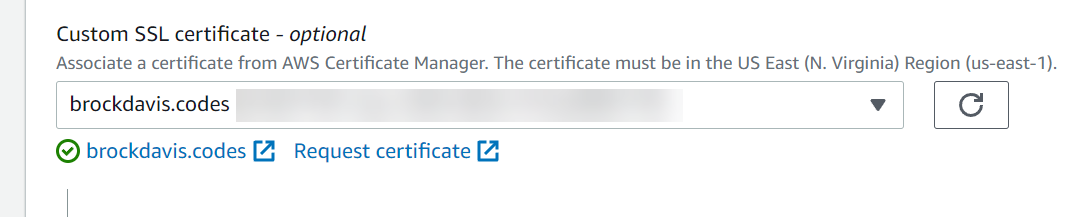
Click Request certificate

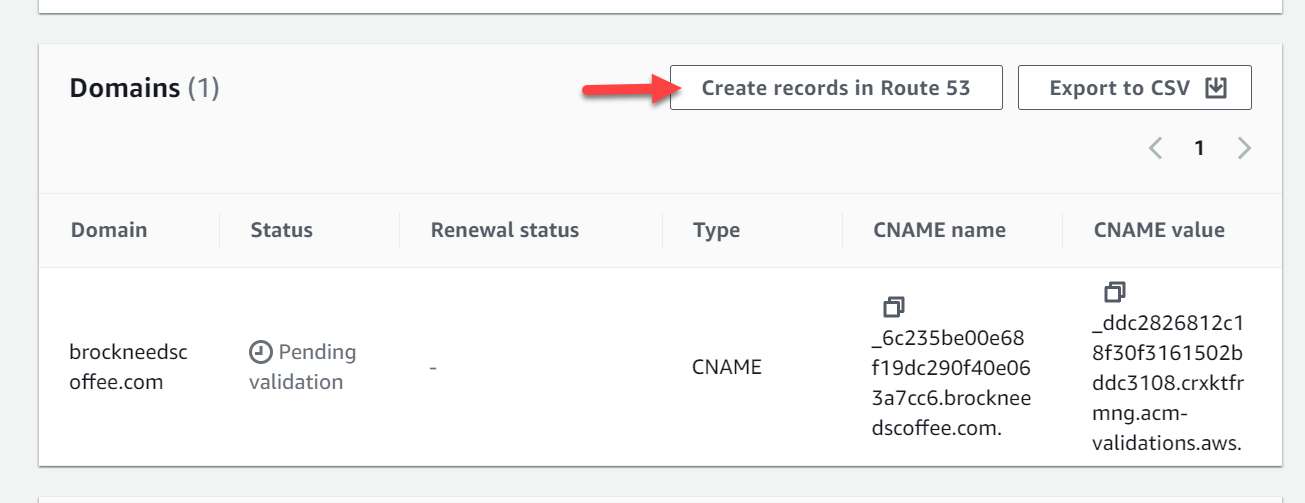
Input your domain name, select DNS Validation, then Request

On the next screen, select Create records in Route 53 then select Create records

Once the certificate is validated, select it on the create distribution screen and create the distribution.
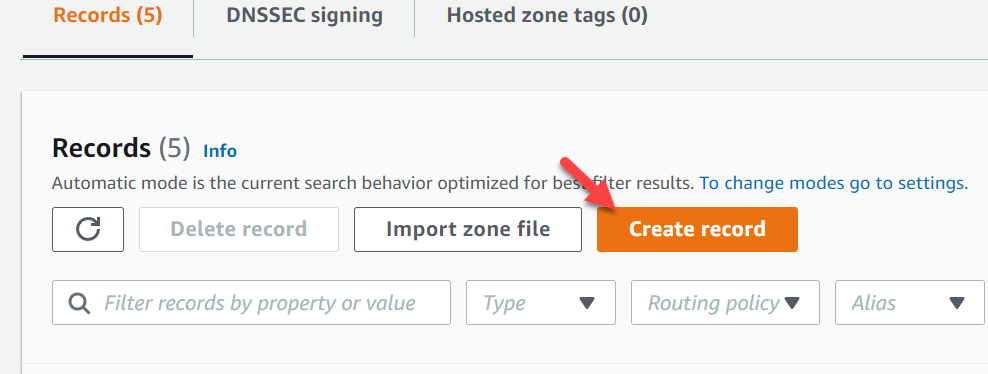
Setting up Route53
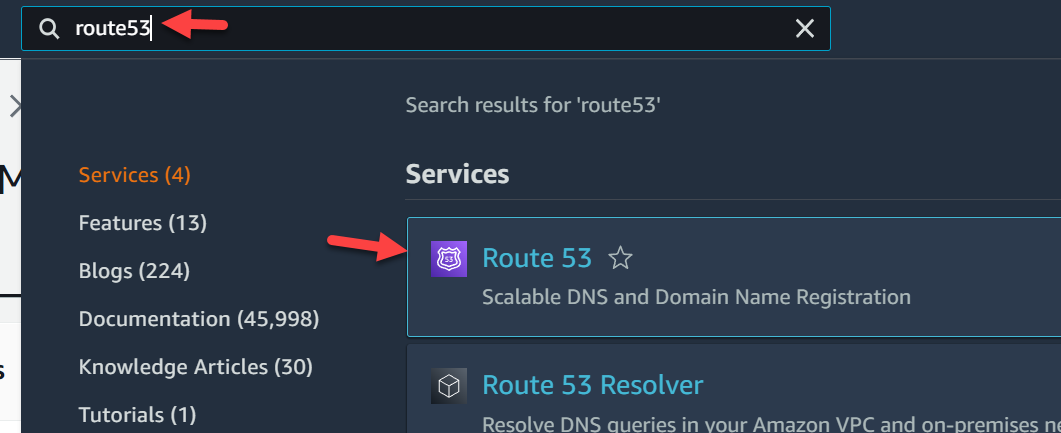
Search for Route 53
Select your domain and create a new record
Leave the first box empty, make sure is it an A record, toggle the Alias toggle, select ALias to Cloudfront distribution, and select the distribution you just created. Then click Create records.
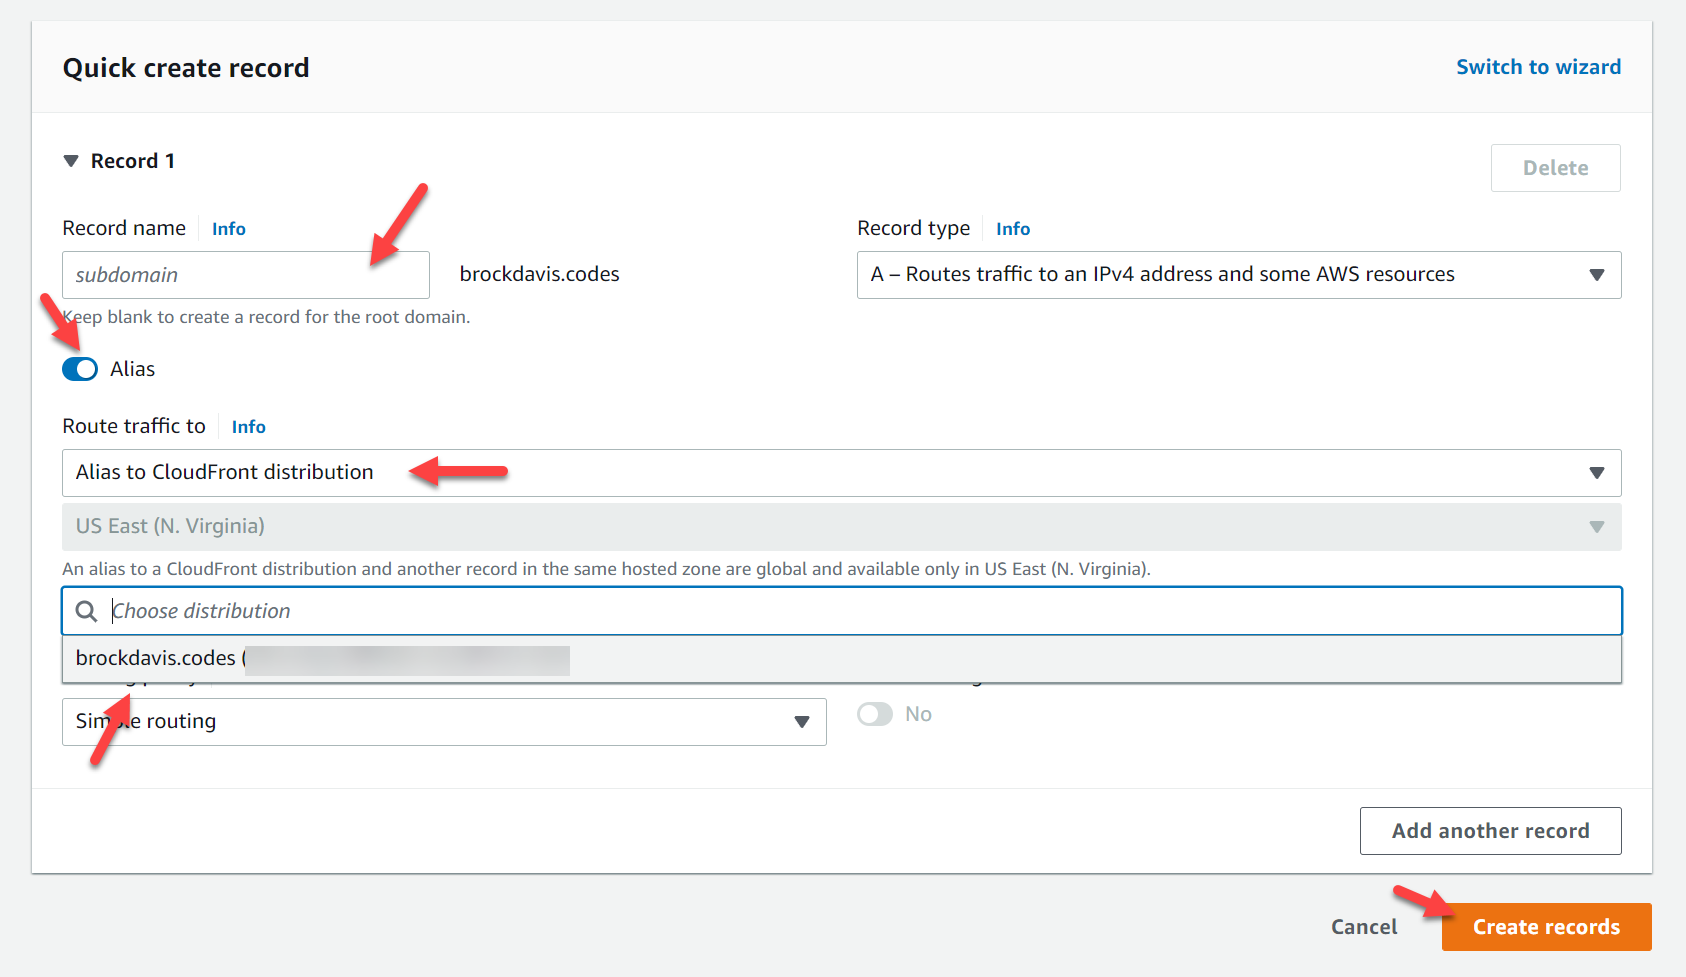
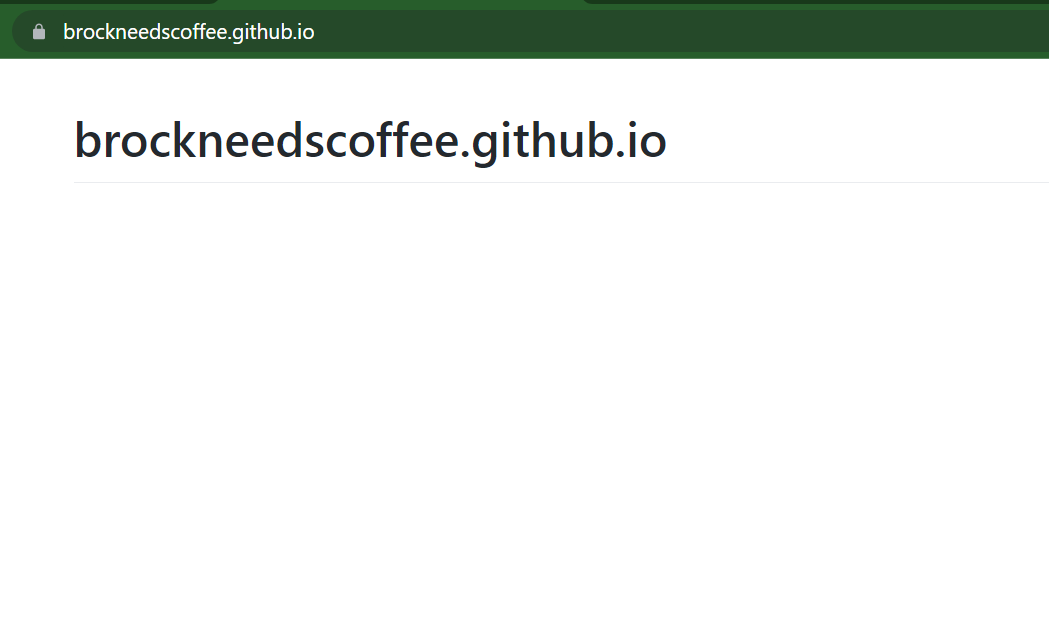
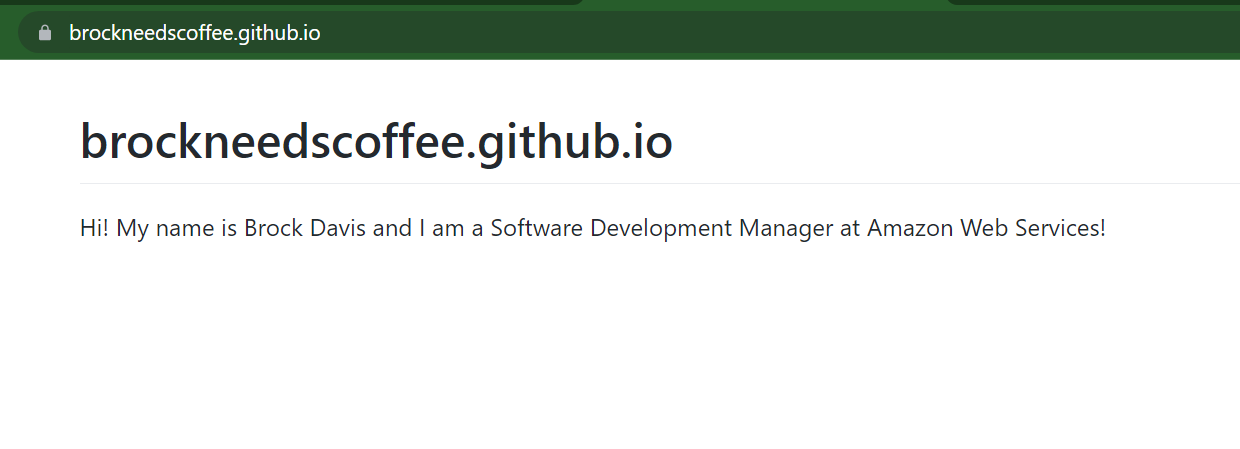
Once that is saved you can navigate to your static site using your custom domain